Original Link: https://www.anandtech.com/show/1436
Canon PowerShot S60: Follow-up to the S50
by Stephen Caston on August 17, 2004 12:00 AM EST- Posted in
- Digital Camera
Index
Product Sample provided by Newegg.com The PowerShot S60 is Canon's follow-up to the S50. Both cameras share the same 5 megapixel sensor, however, there are several upgrades to the new model as well. The PowerShot S60 has a slightly wider zoom of 28 - 100mm (35mm equivalent) compared to the S50's 35 - 105mm. The S60 has an improved macro mode capable of focusing as close as 1.6" compared to 3.9" on the S50. Also, the maximum video resolution has gone up from 320x240 to 640x480. Compared to the S50, the body of the S60 is a little bit longer and thinner. Another major change to the design involves the directional controller on the back. On the S50 many people complained about the awkward one-button arrow pad. This issue has been resolved on the S60 which features a 4-way arrow pad with independent "Set" button in the middle.
We are going to take a close look at the S60 to see how it performs in our regular suite of tests.
Canon PowerShot S60 Specifications
| Canon PowerShot S60 | |
| Release Date | May 2004 |
| Price | $420-500 |
| Pixel Count | 5.0 Million |
| Camera Type | Compact |
| Highest Resolution | 2592x1944 |
| Lower Resolutions | 2048x1536, 1600x1200, 640x480 |
| Sensor Type | CCD |
| Sensor Size | 1/1.8" |
| LCD Screen Size | 1.8" |
| Optical Zoom | 3.6x; 28 - 100mm equivalent |
| Focus Range | AF=W/T: 16.8" - Infinity MF=W: 1.6" - Infinity; T: 12" - Infinity |
| Macro Range | 1.6 - 16.8" |
| Digital Zoom | 4.1x |
| Lens Thread | Fits accessory lenses |
| Auto Focus | Yes |
| Auto Focus Type | TTL, 9-point |
| Manual Focus | Yes |
| Aperture Range | W: f2.8 - 8.0; T: f5.3 - 8.0 |
| Shutter Speeds | 15 - 1/2000 th sec. |
| ISO | Auto, 50, 100, 200, 400 |
| Flash | Built-in |
| Flash Range | W: 1.8 - 14'; T: 1.8 - 6.6' |
| Flash Compensation | +/- 2 stops in 1/3 stop increments |
| Exposure Compensation | +/- 2 stops in 1/3 stop increments |
| White Balance | Auto, Daylight, Cloudy, Tungsten, Fluorescent, Fluorescent H, Flash, Underwater, Custom |
| Bracketing | AE: +/- 2 stops in 1/3 stop increments; Focus |
| Metering | Evaluative, Center-weighted average, Spot |
| Color Space | RGB |
| Aperture Priority | Yes |
| Shutter Priority | Yes |
| Manual Exposure | Yes |
| Continuous Drive | ~2.2 fps for 8 images (Large/SuperFine) |
| Self-Timer | Yes, 10, 2 sec. |
| Storage Method | CompactFlash type I or II |
| Storage Included | 32MB CompactFlash card |
| Compressed Format | JPG |
| Uncompressed Format | RAW |
| Quality Settings | SuperFine, Fine, Normal |
| Video clips | 640x480 (10 fps, 30 sec. max); 320x240, 160x120 (15 fps, 3 min. max); AVI w/sound |
| Battery Type | NB-2LH |
| Charger Included | Yes, 1.5 hours |
| PC Interface | USB |
| TV-out | Yes |
| Tripod Mount | Yes, metal |
| Weight (w/out battery) | 8.1 oz. |
| Dimensions | 114.0 x 56.5 x 38.8mm |
| Included in the Box |
|
The Design: Canon PowerShot S60
 Click to enlarge. |
 Click to enlarge. |
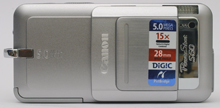
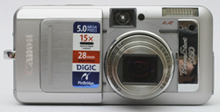
On the front of the S60 is the 3.6x optical zoom lens which is equivalent to 28 – 100mm on a 35mm camera. The lens has an aperture range of f2.8 – 8.0 and a shutter speed range of 15 – 1/2000 th sec. The camera powers on along with the extension of the lens when the door is slid to the side. Besides extending the lens, sliding the door also uncovers the viewfinder window, the Self-timer/AF-assist/Red-eye reduction lamp, and the built-in flash. The flash has a working range of 1.8 – 14 ft. in wide angle and 1.8 – 6.6 ft. in telephoto. This range is a little bit smaller than what the S50 offered, especially at the telephoto end. Just below the flash is the microphone and a Remote Sensor for the optional remote control.
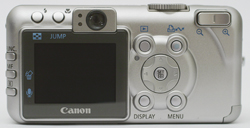
The back of the camera features a 1.8” LCD monitor with 118,000 pixels. In regards to functionality, the largest improvement over the S50 is the abandonment of the old 4-way selector button. The S60 has a 4-way arrow pad with an independent “Set” button in the middle making navigation much easier. Below the arrow pad are the Display and Menu buttons and above are the Play and Print/Share buttons. Just to the lower left of the Play button is the power/mode indicator lamp. At the top right is the zoom controller. We were able to count 8 levels of optical zoom. Above the LCD monitor are the Flash and Macro buttons and the optical viewfinder. Just to the left of the viewfinder are 2 lamps: one indicating compact flash activity and the other indicating focus status. To the left of the LCD monitor are 3 more buttons: Function, MF/Delete, and Metering/Microphone. The last two are dual-function buttons. Pressing the MF/Delete button will activate Manual Focus in record mode and Delete in play mode. Similarly, pressing the Metering/Microphone button will select metering in record mode and record a voice memo in play mode.
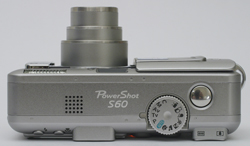
The top of the S60 is fairly straightforward. There is a speaker for playing back audio in movie clips and voice memos. To the right is the Shooting Mode dial and the Shutter button.
 Click to enlarge. |
 Click to enlarge. |
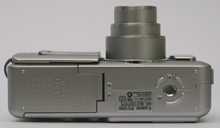
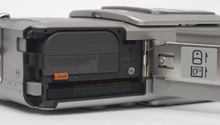
There is a metal tripod mount on the bottom of the camera as well as a sliding door that reveals the battery and CF compartment. The S60 comes with a rechargeable NB-2LH Lithium-ion (7.4V 720mAh). The camera is also packaged with a 32MB CompactFlash card. The S60 can use either Type I or II cards.
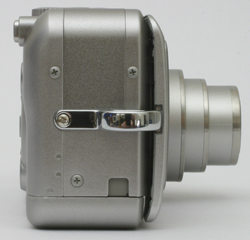
On the right side is a wrist strap post. Also visible is the opening in the battery compartment for the optional DC coupler cable.
 Click to enlarge. |
 Click to enlarge. |
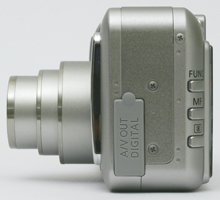
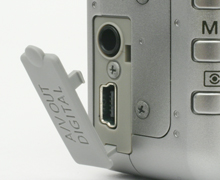
On the left side of the camera are an A/V out and USB port. They are protected by a rubber tab that snaps in place.
Recording Features
The S60 can record images in different resolutions with quality options SuperFine, Fine, or Normal . The resolution options are below:
| Setting | Compression | Resolution (pixels) |
| |
||
| |
||
| |
||
| |
||
| S | JPG |
In RAW mode, you can also choose from the 4 JPG options above to be recorded along with the RAW file. This JPG is mainly used as the playback image in-camera (instead of showing you the larger RAW file).
The S60 has a great array of exposure modes from fully automatic to fully manual. To select a mode, you simply rotate the Shooting Mode dial to the setting you want. Canon has arranged the 13 mode options into three categories: Auto, Image Zone, and Creative Zone. We’ll begin with Auto.
In Auto mode, the camera basically does all of the work for you. Based on the lighting situation, the exposure is automatically determined, allowing the user to simply point and shoot. Although most of the camera’s settings are automatically set, the user has a few limited adjustable shooting options. For example, you can select a flash mode: Auto, Auto w/Red eye, or Flash off. The Macro mode can be enabled or disabled. Finally, you can set a 10 or 2 second self-timer.
In the Image Zone, there are 7 different shooting modes: Portrait, Landscape, Night Scene, Fast Shutter, Slow Shutter, Stitch Assist, and Movie. In Portrait mode, the camera automatically uses a large aperture (small f-stop number) to keep the subject in focus against a blurry background. The effect of the blur can be maximized by using the telephoto end of the optical zoom. With Landscape mode, the S60 will use a small aperture (large f-stop number) to produce an image with a larger depth-of-field in order to keep as much as possible in focus. Night Scene is designed to be used in low-light situations. The camera fires a flash to light up the main subject and keeps the shutter open to allow ambient light to fill in the rest of the scene. This two part exposure is referred to as “slow sync” and is designed to produce a more natural looking picture. Fast Shutter mode is basically the same as “Sports mode” seen on other cameras. When selected, the camera will set the shutter speed to the highest possible setting in order to “freeze” fast subjects in the picture. Slow Shutter mode is the exact opposite: the camera will select a slow shutter speed to create a blurred effect on the final picture. With Stitch Assist mode, the S60 helps to take pictures in a panoramic series that can later be “stitched” together with the included software.
In Movie mode, the S60 can record video clips (with sound) as AVI files in one of 3 resolutions: 640x480, 320x240, or 160x120. At 640x480, the video clip will be 10 fps with a maximum record time of 30 seconds. With the smaller resolutions, the video clips are recorded at 15 fps with a maximum time of 3 minutes. On our General Image Quality page, we will take a closer look at the capabilities of the S60’s Movie mode.
There are 5 available modes in the Creative Zone: P (Program AE), Tv (Shutter priority), Av (Aperture priority), M (Manual), and C (Custom). With the Creative Zone modes, the camera gives you much more exposure control than in Auto or the Image Zone modes. Also, there are several menu options that are only available in the Creative Zone. Each mode offers a different number of the options listed below:
| Record Menu | |
| Flash Sync | 1st-curtain, 2nd-curtain |
| Slow Synchro | On, Off |
| Flash Adjust | Auto, Manual |
| Red-eye | On, Off |
| Wireless Delay | 0, 2, 10 sec. |
| Spot AE Point | Center, AF Point |
| Safety Shift | On, Off |
| MF Point Zoom | On, Off |
| AF-assist beam | On, Off |
| Digital Zoom | On, Off |
| Review | Off, 2 – 10 sec. |
| RAW+JPEG Rec. | L, M1, M2, S |
| Intervalometer | Interval Time/No. of shots |
| Save Settings | Set |
Flash Sync tells the camera to fire the flash either with the first or second curtain. With Slow Synchro on, the flash will operate with a slow sync: the flash illuminates the subject and the shutter stays open longer to allow in ambient light. The Spot AE Point option refers to which point the camera will use to meter the scene when set to Spot metering mode. Safety Shift will automatically adjust the aperture or shutter speed in Av and Tv mode if the selected setting will produce a poor exposure. This is a safeguard that can be turned on or off. When using manual focus, if MF Point Zoom is on, the focus point will become magnified to assist in focusing the picture. The Intervalometer option is a time-lapse photography option. You can set the time from 1 – 60 minutes and the number of shots from 2 – 100.
In P (Program AE) mode, the camera automatically sets the aperture and shutter speed. It is different from Auto mode in the wide variety of options that can be adjusted. For example, the user still has control over advanced features such as white balance, ISO setting, metering mode, exposure compensation, etc. In Tv mode, the user selects the desired shutter speed and the camera automatically selects the appropriate aperture setting. The opposite is true of Av mode; the user selects the aperture and the camera selects the shutter speed. In Manual mode, the user has control over both the aperture and shutter speed. Custom mode allows you to customize settings, allowing you to switch to your own preset mode by simply turning the Mode dial to C. This is done by switching to C mode and setting up the options the way you want them. Then, by selecting “Save Settings” in the Menu, the options are stored for future use in C mode.
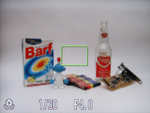
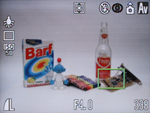
The S60 has a 9-point auto focus system that attempts to detect the subject based on the object in the frame that is closest to the camera. There are other options to choose from as well. For example, in Auto, Portrait, Landscape, Night Scene, Fast Shutter, and Slow Shutter modes, you can use the 9-point AF or the very center focal point. Pressing the “Set” button switches between these two options. In the Creative Zone modes, the camera will use the center AF point by default. However, pressing the “Set” button highlights the AF frame. Once it is highlighted, the AF frame can moved to one of 345 locations in the frame. This allows for quite a bit of control over the focusing point of the camera.
 Center AF |
 Custom AF |
The S60 employs the Function button on the back left side of the camera to handle all major shooting settings. The following settings can be adjusted via the Function button:
| Function Menu | |
| Exposure Compensation | +/- 2 stops in 1/3 stop increments |
| White Balance | Auto, Daylight, Cloudy, Tungsten, Fluorescent, Fluorescent H, Flash, Underwater, Custom |
| Drive mode | Standard Cont. Shooting, High Speed Continuous Shooting, 10 sec, 2 sec. Self-timer, Wireless Remote |
| ISO Speed | Auto, 50, 100, 200, 400 |
| Photo Effect | Off, Vivid, Neutral, Low Sharpening, Sepia, B/W, Custom Effect |
| Bracketing | Off, AEB, Focus |
| +/- Flash (Compensation) | +/- 2 stops in 1/3 stop increments OR 1/3, 2/3, Full Flash |
| Image Size and Quality | L, M1, M2, S (SuperFine, Fine, Normal), RAW |
Exposure Compensation is the first option listed when you press the Function button. Compensation can be made for +/- 2 stops in 1/3 stop increments. It’s nice to see that Canon included so many options for white balance on the S60, including Custom and a new Underwater setting for the optional Waterproof Case (WP-DC40). For Drive mode, there are two types of Continuous Shooting modes: Standard and High. The difference between these two is that in Standard mode the camera will display a brief review of each image after it is taken. This allows you to monitor the pictures as you take them. In High Speed mode, the monitor turns off while capturing to increase shooting speed.
Setting the ISO mode to Auto will allow the camera to automatically choose the appropriate ISO for a given situation. The higher the ISO setting, the more sensitive the camera will be to light. Higher ISO settings also tend to yield noisier images than lower ISO settings. There are a good number of options for “Photo Effects” on the S60. The Custom Effect allows you specify a specific level of Contrast, Sharpness, and Saturation. These options are each adjustable to 3 levels: Weak, Neutral, and Strong.
The S60 has the ability to perform AEB (Auto Exposure Bracketing). The AEB is adjustable to +/- 2 stops in 1/3 stop increments. After setting the AEB, pressing the shutter button will take 3 pictures in a row. The exposures will vary as follows: standard exposure, underexposure, and overexposure. Also available is Focus Bracketing. With Focus Bracketing, the camera will take 3 pictures in a row with the following focus changes: normal focus, front focus, and back focus. Focus Bracketing is only available in Manual focus mode. It is designed to help achieve a focused picture even if your manual focus setting is a little off. The focusing range can be selected from 3 levels. In addition to Exposure Compensation, the S60 offers Flash Compensation. When the menu option “Flash Adjust” is set to Auto, the Compensation can be set to +/- 2 stops in 1/3 stop increments. When Flash Adjust is set to Manual, the option changes to 1/3, 2/3, or Full Flash Output.
To change the camera’s light metering mode, you must press the Metering/Microphone button on the back of the camera. Each press of the button cycles through the following options: Evaluative, Center-weighted, and Spot AE Point. With Evaluative metering, the camera determines the correct exposure by taking into account such factors as subject position, backlighting, the background, etc. Center-weighted metering determines the correct exposure by placing more emphasis on the center of the frame. With Spot metering, the camera uses a small area of the frame to determine the proper exposure. In the menu, you can choose which area is used to determine the Spot reading. The options are Center or AF point. If Center is selected, the camera will measure from a small portion in the center of the frame. If AF point is selected, the camera will use the AF point to determine the exposure.
In addition to the Record Menu, there is a Set up menu and a menu called “My Camera” that allows you to select startup images and operational sounds. With the use of a computer, you can even use your own images and sounds. The Set up menu options are below:
| Set up Menu | |
| Mute | On, Off |
| Volume | Start-up, Operation, Selftimer, Shutter, Playback |
| LCD Brightness | Low, High |
| Power Saving | Auto Power Down (On, Off), Display Off (10, 20, 30 sec, 1, 2, 3 min.) |
| Date/Time | Set |
| Format | Set |
| File. No. Reset | On, Off |
| Auto Rotate | On, Off |
| Distance Units | m/cm, ft/in |
| Language | English, Dutch, French, etc. |
| Video System | NTSC, PAL |
There are a few addition features that we should mention. While recording in JPG format, pressing “Function” button immediately after taking a picture (during the review) will give you the option to save the image as a RAW file instead of a JPG. We found this to be a pretty cool option. Another feature that is worth noting is the S60’s ability to lock focus and exposure separately. Normally, focus and exposure are set when the shutter is half-pressed. With the S60, after you have half-pressed the shutter button you can press the Metering/Microphone button to lock the current exposure. Then, you can let go of the shutter button and recompose the scene. This feature really comes in handy when you are in tricky lighting situations. Another interesting feature is the ability to record a sound memo that will be linked to a picture. To do this, you simply press the Meter/Microphone button either immediately after taking a picture or later in play mode. The sound clip is recorded as a WAV file with the same number as the picture.
Playback Features
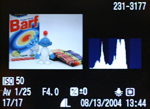
To enter playback mode there are two options. If the camera is powered off, you can hold down the Play button for a second to enter playback mode without extending the lens. If the camera is already powered up and in record mode, you can simply press the Play button to switch over to the playback screen. Either way, the same options are available. By default, the playback screen shows the picture as a full-screen display with no information. By pressing the Display button once, the following information will be added to the screen: filename, image number out of total images recorded, resolution size and quality, and the date/time. Pressing the Display button again shrinks the image to about 1/4th of the screen and adds the following information: record mode, shutter speed, aperture, exposure compensation value, white balance, metering, and a histogram. We should point out that any overexposed areas in the picture will flash continuously. This is a nice feature that provides immediate feedback of overexposure problems. Pressing the Display button again will clear the screen of all information and return the picture to its original full-screen status.
 No info. |
 Basic info. |
|
An image viewed in playback mode can be magnified by using the zoom control (W/T). The image can be viewed in 10 different levels of magnification. While magnified, you can navigate to different portions of the image using the arrow pad. We found zooming in and out and scrolling across the images to be fast and responsive. When an unmagnified image is being viewed a 9-thumbnail image display can be reached by pressing either the zoom-out control or the Flash/Thumbnail button. While in the thumbnail display, pressing either the zoom-out control again or pressing the Macro/JUMP button will enable JUMP mode. While in JUMP mode, pressing the left or right arrow buttons will jump behind or ahead 10 images. This makes finding a picture easy even when there are several to look through.
To delete a picture, you can simply press the MF/Delete button and a dialog will prompt you “Erase” with the options “Erase” and “Cancel”. In playback mode, you have the option to record a sound memo with the same filename number as the picture you are viewing at the time. The sound clips can be recorded up to 60 sec.
The menu options in playback mode are listed below:
| Play Menu |
| Protect
|
| Rotate
|
| Erase All
|
| Slide Show
|
| Print Order
|
| Transfer Order
|
The protect option allows you to mark specific files as “protected” so that you will not be able to accidentally delete them. The rotate feature allows you to select individual images to be rotated in-camera. The Erase All function simply confirms that you wish to “Erase all images?” and deletes everything on the flash card (except for protected images). The Slide Show option allows you to use either all images or to choose specific images. You can customize 3 separate groups to choose between. Other options include Play Time with settings Manual (manual advance), 3 – 10, 15, and 30 sec. There is also a Repeat option that can loop the slide show. The Print Order feature refers to DPOF (Digital Print Order Format) and allows you to specify specific images to print on a DPOF-compatible printer. You can choose to print Standard, Index, or Both with options to include the date and/or file number. With the Transfer Order option, you can specify which images you would the camera to transfer automatically when it is connected to your computer.
Edit movie feature
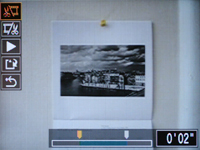
When playing back movie clips in the camera, you have the option to edit the start and stop points. After specifying the new points, you can play the new edit and save the modified clip either as a new file or in place of the old clip. During playback, volume can be adjusted by using the up and down arrow pads. On a side note, we are happy to see that the S60 switches back to record mode whenever the shutter is half-pressed (even while editing a movie). This means the camera is always ready to shoot the next picture.
Battery Performance
Our general method for battery testing is to reset the camera to its default settings and change the recording mode to the highest quality option. Then, we take 5 pictures without the flash and 2 pictures with the flash until the battery is dead. For more information on our battery test, please refer to our Testing Procedures (link to http://www.anandtech.com/digitalcameras/showdoc.aspx?i=2105&p=4) page. For this test, we used the included NB-2LH rechargeable battery pack . The battery was fully drained before charging for the test.
| Number of shots taken in one battery charge |
| 1,040 |
At 1,040 shots, the S60 put in a fairly good performance. Although our test is designed for optimal performance, you can certainly expect the battery to last through a full day of off and on shooting. Considering the NB-2LH is a relatively small battery pack, we were impressed with these results.
The Timing Tests
* NOTE: For all of our time tests, the camera was reset to its factory default settings and set to record using the highest resolution and quality JPG setting. A SanDisk Ultra II 512 MB CF card was used.
Before reading our results, please refer to our Testing Procedures page.Startup Time
The startup time is recorded from the moment the power button is pushed to the moment the shutter sounds.| Startup time (seconds) |
| 3.98 |
The startup time on the S60 was just about average at almost 4 seconds. We found no difference in speed when we disabled the startup image. The startup time will vary slightly based on the flash card used.
Shutter Lag
To record shutter lag, we perform two tests. For the first test, we pre-focus the lens and measure the amount of time it takes the camera to take a picture after the shutter button is pressed. The second test measures the time it takes for the camera to take a picture after we press the shutter button without pre-focusing. Each test is performed 3 times and the results are averaged. For more information regarding our testing procedures, please refer to our Testing Procedures page.
| With Pre-focus (seconds) | Without Pre-focus (seconds) |
| .08 | .69 |
The lag times were very good overall. A pre-focus lag time of .08 sec. is so small that it is hardly noticeable when shooting and the focus-lag time of .69 sec. fairs pretty well compared to other current digicams. The Nikon Coolpix 5200, for example, had a pretty average time of .82 sec.
Write Times
We recorded 5 different write times with a SanDisk Ultra II 512 MB CF card: Single Shot, Shot to Shot, Shot to Shot w/Flash, and Shot to Shot w/Buffer Full.
Single Shot – The time it takes for a single picture to be completely written to the flash card
Shot To Shot (STS) – The time until the second shot is able to be taken after the first
Shot To Shot w/Flash – The time it takes for the camera to take two pictures with the flash starting from the moment the first flash is fired to the moment the second is fired
Shot To Shot w/Buffer Full – The time between shots when the buffer is full
We set the camera to the highest resolution and quality JPG setting. We performed each test three times in Auto mode and averaged the results. Below are the resolution, quality setting, and average file size used for the tests.
JPG, 2592x1944, SuperFine, Avg. file size = 2.05MB
| CF card (seconds) | |||
| Single Shot | Shot To Shot | Shot To Shot w/Flash | Shot To Shot w/Buffer Full |
| 2.73 |
1.87 |
5.54 |
3.67 |
Although we were not blown away by the S60’s Single Shot time of 2.73 sec., the Shot To Shot time was very fast at 1.87 sec. Shot To Shot w/Flash showed a slightly below-average performance of 5.54 sec. After we filled the buffer with 8 images, the shooting slowed to 3.67 sec between shots.
We should also note that in our tests we were able to shoot 6 images at 1.97 fps in Standard Continuous Shooting mode. The time between the 6th shot and the 7th shot was 1.67 sec. After the 7th frame, continuous shooting slowed to 2.97 sec. between shots. In High Speed Continuous Shooting mode, we were able to shoot 8 images at 2.19 fps. It was 1.97 sec. between the 8th and 9th frame. After the 9th frame, shooting slowed to 2.40 seconds between shots.
Resolving Fine Lines
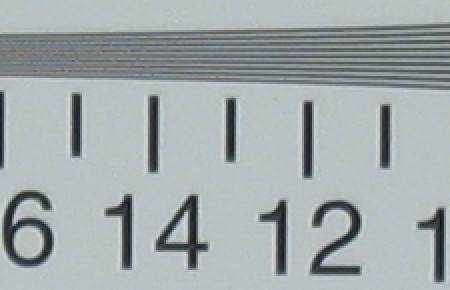
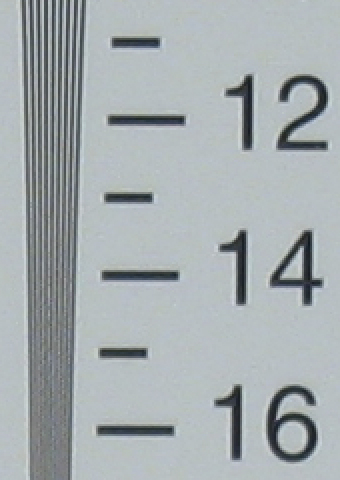
For our resolution test, we reset the camera to its default settings and then recorded the image in the highest quality JPG mode with +0.7 EV applied. Manual WB was used. For more information, refer to our Testing Procedures page. Below are 200% crops of the test. Click on a crop to see the full chart.
In both the horizontal and vertical crops above, the S60 retains its line clarity out to about the 13 mark. While the vertical crop shows just a bit better performance, both move to extinction by 15. In short, the S60 showed impressive resolution performance in our test.
Color Reproduction
* For all of our color tests, we reset the S60 to its factory default settings. It was then set to record using the highest quality JPG option.We took a picture of our color chart using each of the following WB settings: Auto, Tungsten, and Manual. Click on a thumbnail below to view the full-size image.
| Auto WB | Tungsten WB | Manual WB |
 |
 |
 |
 Reference Chart ("actual colors") |
||
Crops
| Auto WB | Tungsten WB | Manual WB |
 |
 |
 |
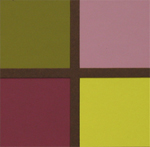
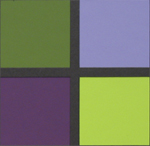
Most current digital cameras have trouble reproducing appropriate colors under tungsten lighting with Auto WB. It seems that the S60 is a little worse than average when it comes to this problem. In the Auto WB crop the strong yellowish-orange cast causes the colors to look very different from the other crops. In fact, the light blue patch (upper-right) turns out looking pinkish-purple in our test. That said, the Tungsten and Manual settings did a wonderful job reproducing accurate colors.
Studio Shot
In this shot, we tested the camera's ability to reproduce colors in our studio shot using different WB settings. The camera was set to Aperture priority mode (f4.5) without the flash.| Auto WB | Tungsten WB | Manual WB |
 |
 |
 |
The yellowish-orange cast from the AWB setting is very visible in our studio shot here. There is just a slight bluish tint on the Tungsten setting. Overall, however, the Tungsten and Manual WB settings produced very pleasing results.
Built-in Flash
For the flash test, we set the camera to Auto mode (with Auto WB). The picture was taken from 5 feet away.
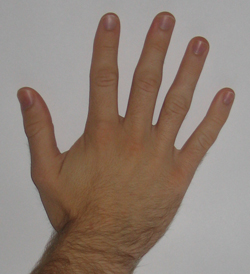
The S60 produced a bright natural-looking skin tone. Overall, we were very impressed with the results of the built-in flash in our test.
Noise
The noise test consists of pictures of our studio shot taken at increasing ISO levels to show the effect on the image. The pictures were taken after resetting the camera to its factory default settings. The highest quality recording mode was used. Click on a 100% crop below to view the full-size image.| Canon PowerShot S60 (Manual WB) | |
| ISO 50 |  Click to enlarge. |
| ISO 100 |  Click to enlarge. |
| ISO 200 |  Click to enlarge. |
| ISO 400 |  Click to enlarge. |
As you can see from the crops above, noise doesn’t become a real problem until ISO 400. Even at ISO 200, the image retains a good amount of detail and is quite usable. At ISO 400, there is a significant addition of noise and loss of detail. Overall, we were very impressed with the noise performance on the S60.
General Image Quality
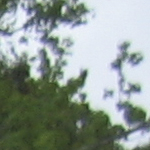
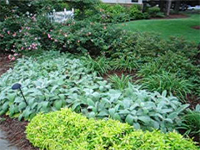
For these pictures, the camera was reset to its factory default setting. Then, it was set to its highest quality JPG setting. The pictures were then taken in Auto mode unless otherwise stated. Click on a thumbnail to view the full-size image. The crops below the thumbnails are 100%.Overall, we were satisfied with the image quality of the S60. Although chromatic aberrations are visible in some of our sample shots, we feel that most users will not find this to be a huge issue in terms of overall quality. The S60 is capable of producing well-exposed pictures without any effort in Auto mode and we were impressed with the detail in Macro mode.
Video
Below are two samples from the S60's Movie mode.
 320x240, 15 fps Right click to download. |
We weren't very impressed with the quality of the S60's video capability. In 640x480 mode, the images are very choppy at 10 fps. Although the second clip is taken at 15 fps, it would be hard to say the video looks smooth. We were also disappointed that the clips were limited to 30 seconds at 640x480 and 3 minutes at 320x240 and 160x120. In general, we would really like to see Canon make some major improvements to their Movie mode.
Final Words
The Canon PowerShot S60 offers quite a bit of versatility with exposure modes ranging from Auto to Manual. It offers options to record in either RAW or JPG mode. It even has advanced features such as AE and FE lock. In addition, you can use the 9-point AF system or select your own Custom AF point. The S60 has an updated design improving on the layout of the S50.
We found the S60 to be a good performer overall with only a few minor flaws. It put in a solid performance in our fine line resolution test. In our general image quality samples, we found the S60 to provide sharp and even exposures with a pleasant level of saturation. Although we spotted some areas with chromatic aberrations, we feel that this does not detract too much from the general overall quality and is to be expected from a wider lens on a compact camera. We found that the Auto WB setting worked well except under tungsten lighting. However, in tungsten lighting the color reproduction was very accurate when using the "tungsten" or "manual" preset. In our noise tests, we discovered that noise does not really become a problem on the S60 until ISO 400. Also the Macro mode provided a great amount of detail in our experience.
On the other side, there are a few points that could be improved upon. Although the S60 has a decent 1.87 sec. "Shot to Shot w/out Flash" time, the time between flash pictures is pretty slow at 5.5 seconds. Also, we really think Canon should work on Auto WB performance under tungsten lighting. It is a problem that most digicams have, but the S60 seems to have more of a problem than other cameras we have reviewed so far. We were disappointed with the S60's Movie mode considering the low frame rate and limited duration. Despite these few items, we feel that the S60 is a great follow-up to the S50. Beginners will find that this camera takes great pictures with little effort and experienced photographers will enjoy its advanced features and impressive resolution.
| Pros | Cons |
|
|
Thanks again to Newegg.com for loaning us the Canon PowerShot S60 for our review.

