
Original Link: https://www.anandtech.com/show/3373
One comment I got to the starfield ceiling blog post asked the question "was it worth it?". Without having the theater done I can't really say if all the effort to make the ceiling was worth it, but honestly it wasn't the most difficult thing out of the entire process thus far. The one thing I can probably say wasn't worth it however was making a curved screen. Now I may change my mind once the theater is done, but given the amount of extra headache a very slight curve has given me, right now it doesn't seem to have been worth it.
Early on in the decision making process I came to the conclusion that I wanted this room to feel like a theater and not a room with a giant TV. So I picked a very wide cinemascope aspect ratio (2.35:1), a giant screen and the finally I decided to go with a slightly curved screen.
Now there are technical reasons why you'd want a curved screen when going with a 2.35:1 setup. The anamorphic lens that you put in front of the projector can introduce some pincushion, which you can correct through the use of a curved screen. Given my throw distance and the type of anamorphic lens I was using, pincushion wasn't really going to be much of an issue but I had to figure this out for myself.
My family room sits on the first floor of the house and is a bit bigger than the theater itself. It has a single uninterrupted wall that was big enough for me to project onto and try and simulate the screen, at first to see how big of a problem the pincushion would be with the anamorphic lens in place.
The first projector I bought for the theater was the Panasonic AE1000U, this was early on in the theater build when I foolishly expected things to be done quickly. I ended up returning the AE1000U because it wasn't bright enough (which I found out after doing this demo), thankfully Costco has the most amazing return policy which let me take it back for a full refund and no questions asked.
Manny and I set up the AE1000U in my family room and projected a 9' wide, 16:9 image on one of the walls. Once we got the 16:9 image to look right and level (which was a pain in itself), we slid the anamorphic lens in front of it. The anamorphic lens has a 1.33x horizontal expansion factor, so it took the roughly 9' wide 16:9 image and stretched it out to be 12' at a 2.35:1 aspect ratio. The source content we were using was 2.35:1, and combined with the AE1000U's built in vertical stretch the end result was a completely natural looking, unstretched, 2.35:1 image with no black bars anywhere on the screen (the projector digitally stretches the image vertically, making everything look tall and narrow, the lens optically stretches it back out horizontally to make everything look natural again).
The lens I used was the ISCO III, which everyone on AVS had agreed on was the best you could get. It was unbelievably pricey and thankfully there are cheaper alternatives such as designs from Prismasonic as well as options to even build your own. At some point I really want to do a head to head between the ISCO III and some of the cheaper lenses to see for myself, if there's any real difference. I've heard that there are actual differences but I have trouble believing that they are huge.
Getting the lens setup right was also nearly impossible, and we had the whole thing setup on my coffee table - I'm dreading doing this whole thing suspended 8' in the air.
At the end of the day we saw a little bit of pincushion with the projected image, and realized that we'd need a very, very slight curve in order to correct it. The smallest standard curvature most of the screen manufacturers offer is a 40' radius, so a 40' radius was going to be it for me. Honestly, at this point I probably should've just called it quits and stuck with a flat screen but I can be an idiot sometimes (read: lots of times).
The problem with a curved screen is it complicates things greatly. For starters, I need a curved screen. Then, I figured if I had a curved screen that I should also have a curved false wall to mount the screen on (that brings the total count of things I need to curve up to two). And finally, it makes it so that I have to work a bit to build a masking system for the screen. Let's talk about the first two problems.
I realized early on that I wasn't going to be buying a screen. Stewart is one of the highest respected screen manufacturers in the industry and they wanted around $10K for a curved 2.35:1 screen at the sizes I was interested in. SMX, the company started by the AVS user who inspired this whole theater build, also offers curved screens at the same quality level of Stewart and they wanted around $5K. Adding on a masking system brought the total screen cost close to $20,000. I don't have any single piece of electronics in my house that costs that much, and we're talking about a screen made out of metal and fabric.
One thing I learned from the SMX thread was that if you are building a non-AT (acoustically transparent) screen, the screen material generally doesn't matter. If you dig through the thread there is one shot in particular where SandManX projects on a wall and compares various non-AT screen samples from a handful of companies (including Stewart) and finds that projecting on his plain white wall is just as good. If I were building an acoustically transparent screen (thus allowing me to place my speakers behind the screen), screen material seems to matter more. I didn't go acoustically transparent because you do lose some brightness projecting on an AT screen (since its perforated), and I didn't want to have to spend $20K on a projector to hit the screen size I was looking at.
That's all the convincing I needed to realize that there wasn't much to gain from buying an expensive screen, so I set off on building my own.
Buying the fabric wasn't hard, a screen maker called Da-lite offers its fabric alone from one online vendor in particular. I ordered a over 12' wide of this stuff and more than I needed vertically so I'd have some spare to make sure I got the mounting right. The total cost for the fabric was around $500.
The frame was the difficult part, since it had to be curved. SMX bought some extruded aluminum tubes and had them bent to a 40' radius at a metal shop. This is the preferred method since aluminum is quite strong and very light at the same time. I wanted something I could do cheap and locally in case I screwed it up, so I went another route.
I saw this design on AVS as well. You basically build a rectangle out of 2"x12"s, with the 2"x12" standing up on the narrow side. The two longer 2x12s need to have a 40' radius cut into them, this gives you the curve for the screen. Then you nail another piece of wood along the curve you've just made and that gives you a frame for the screen, as well as a place to mount the screen material to. The only problem was: I needed to figure out how to cut a 40' radius into something that was 12' long.
Simple, I thought. We drew it out on some graph paper and before building the screen, we built the false/screen wall at the front of the room - which also needed to be on a 40' radius. It looked awesome when it was done:
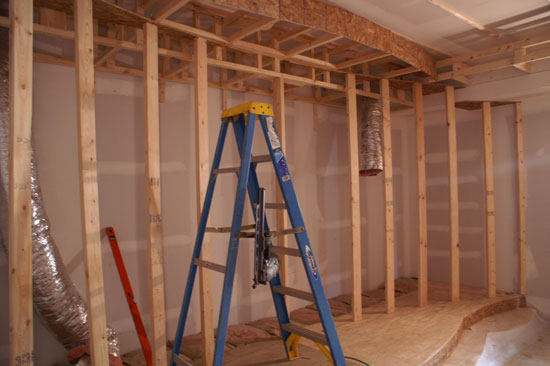
The problem came when we hooked up the projector and tried to project on it. The image was way too happy (the bottom edges curved up a lot) and no adjusting could fix it. I eventually measured a couple points on the curved wall and realized that we hadn't built a wall with a 40' radius, but somehow managed to build a wall with a 15' radius. Don't ask me how we did this, but we did. So it was back to the drawing board.
I had given up on mapping out the wall using graph paper, I wanted to do it mathematically. I knew there was an equation for doing this, and I remember doing it in class, but I could not for the life of me remember how. I was going about it the absolute wrong way. Remembering all of the crazy math I had to do in my engineering classes, I kept trying to derive the equation from a few points I had along the curve. This proved to be a highly inefficient and silly way of going about it. It wasn't until Manny IMed me one day and said something along the lines of "there has to be an equation for a circle or something" that it hit me: I needed the equation for drawing a circle.
For a circle, C, centered on coordinates (h,k) with radius r:
r^2 = (x-h)^2 + (y-k)^2
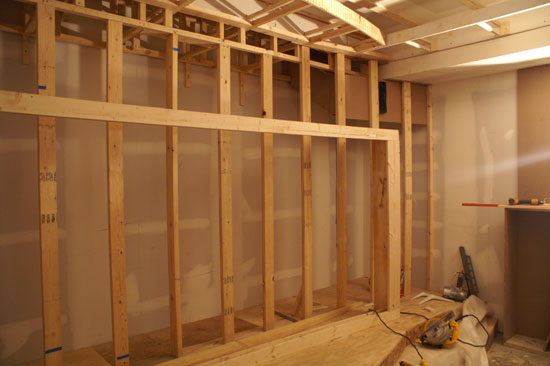
That's all I needed. My radius was 40' (which I converted to inches), and I put the center of the circle at its distance from the back of the theater (something around 15'). By plugging in values for x I could solve for y, giving me the position of the studs for my false wall at whatever increments I wanted (I went with every 10" just to be extra sure I had a smooth curve).
The new false wall was far more subtle than the old one:

Now using the same data I could build the curved screen, thankfully I had help from the framers who put up the starfield ceiling because they were way better at this sort of stuff. If you're good with a saw and can measure, it's not hard to do at all:
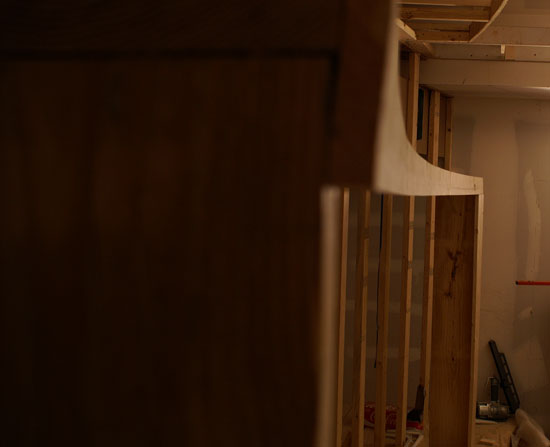
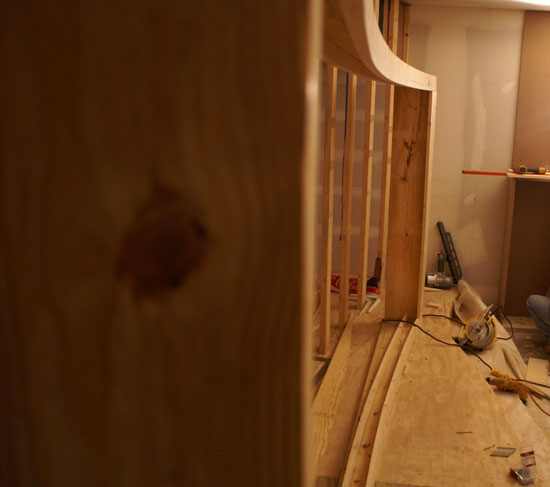
I ended up putting in another curved piece of wood inside of the screen box, a couple of inches away from the outer frame. I would use this smaller piece of wood to actually mount the screen fabric to, and in between it and the actual frame I'd hopefully install whatever masking system I was able to build.
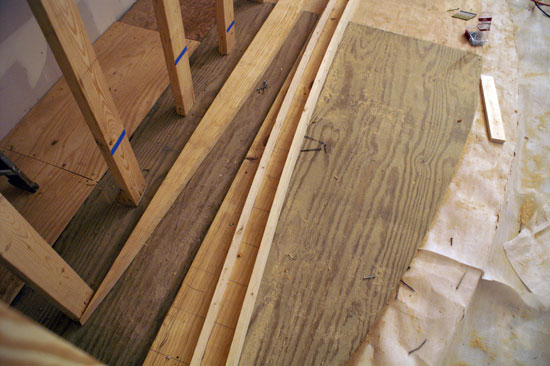
The curved piece of wood on the left will be used to attach the screen fabric to, the masking system will go between it and the second curved piece of wood
I haven't really figured out how to build the masking system but I've got some drapery motors that I've been playing around with and I have a general idea of what I want to do. Remember that the masking system will be used to mask off the sides of the screen when viewing 16:9 or (gasp) 4:3 content.


